Home
Home  Navigation


Conquering Baramos's Lair in Dragon Quest 3 Remake: A Comprehensive Guide
After securing the Six Orbs and hatching Ramia, the Everbird, you're poised to challenge Baramos's Lair in Dragon Quest 3 Remake. This dungeon serves as a crucial test of your skills before venturing into the underworld. This guide details navigating and conquering Baramos's Lair in the Dragon Quest III HD-2D Remake.
Baramos's Lair is the formidable stronghold of the Archfiend Baramos, the primary antagonist in the game's first half. Access is granted only after obtaining Ramia. Aim for a party level of at least 20 before attempting this challenge. The lair holds several valuable items, detailed below.
Reaching Baramos's Lair
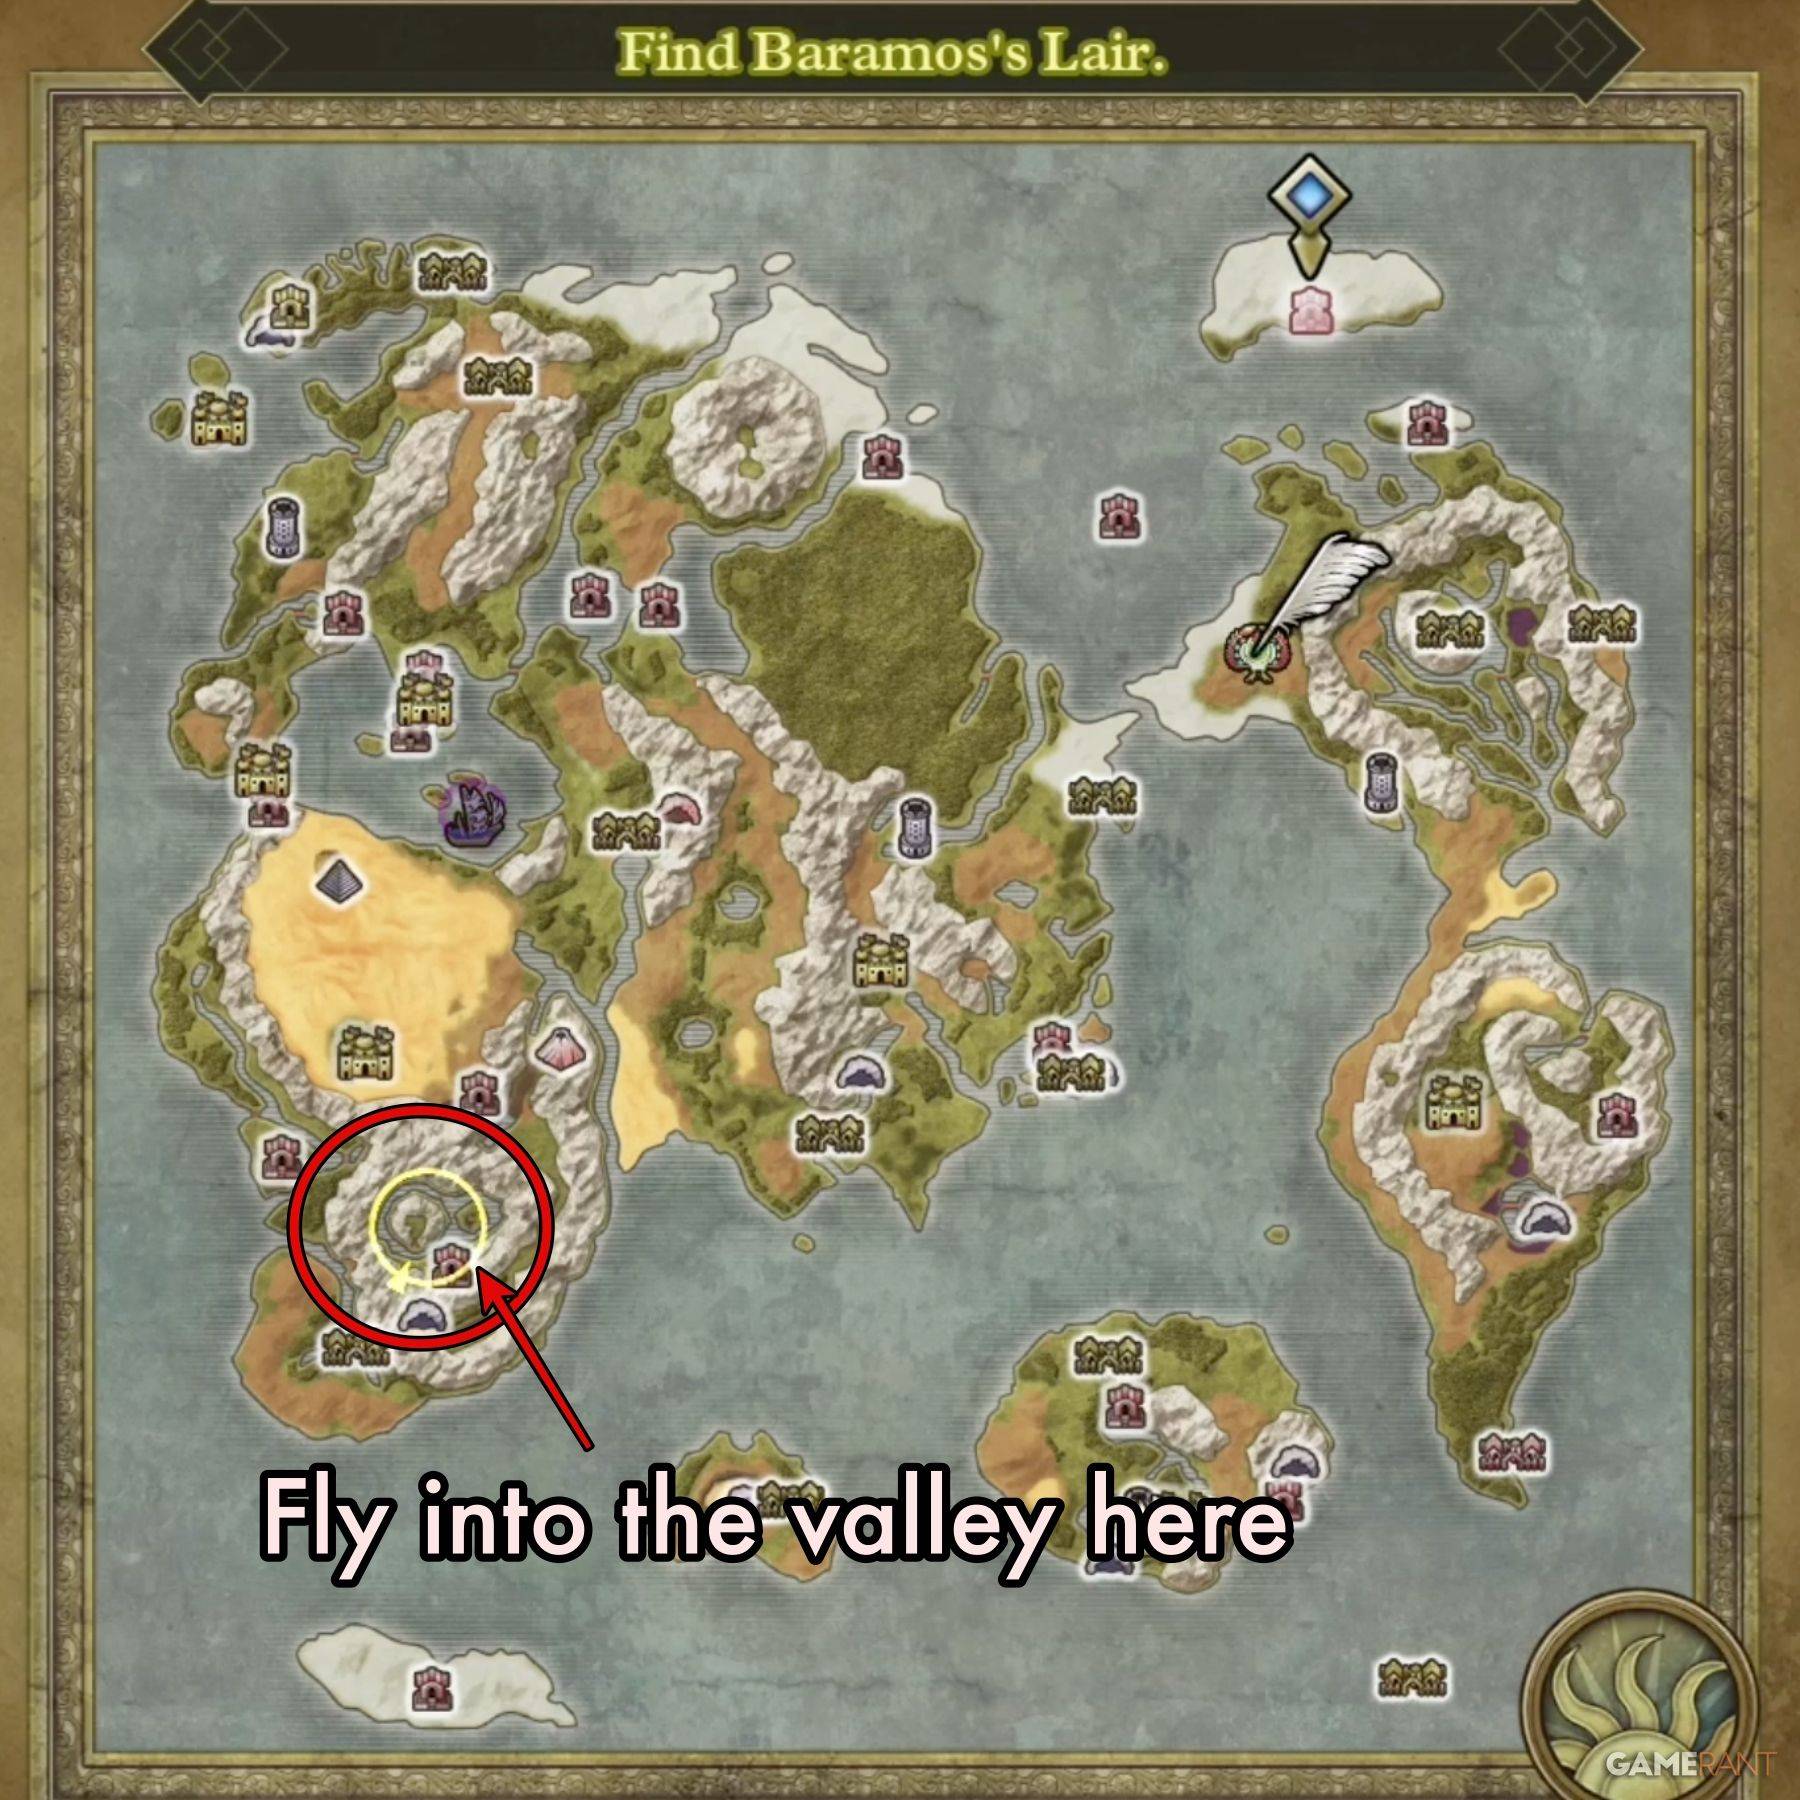
Following the Maw of the Necrogond and acquiring the Silver Orb, Ramia becomes available. Access Baramos's Lair by flying from either the Shrine of the Everbird or the Necrogond Shrine.
North of the Necrogond Shrine lies an island nestled amidst mountains – this is Baramos's Lair. Ramia can transport you directly to the dungeon entrance. Simply proceed north and enter.
Navigating Baramos's Lair
Baramos's Lair deviates from typical dungeon structures. Instead of linear progression, you'll traverse indoor and outdoor areas to reach Baramos.
The main outdoor area, "Baramos's Lair – Surroundings," serves as a central hub. The following outlines the path to the boss fight:
Reaching Baramos:
- From the overworld entrance, bypass the main door. Instead, circumnavigate the castle's eastern side towards the northeastern pool.
- Ascend the stairs leading to the pool, turn left, and proceed west to another stairwell. Ascend and locate a door on the right.
- Enter the Eastern Tower, reach the top, and exit.
- Traverse the castle roof southwestward, descend the stairs, continue west, and navigate the gaps in the northwestern double wall. Use the northwestern stairwell.
- The stairs lead to the Central Tower. Use "Safe Passage" to cross electrified floor panels and descend to B1 Passageway A.
- In B1 Passageway A, head east to the easternmost stairs.
- Enter the South-East Tower, proceed northeast to the stairs, ascend to the roof, and head west to another stairwell. Cross the grass northwest and enter the door.
- This leads to the northeastern section of the Central Tower. Exit.
- In B1 Passageway B, proceed north and ascend the stairs.
- Enter the Throne Room. Avoid floor panels and exit south.
- Head east from the Throne Room (northwest corner of the Surroundings map) to the northeastern structure on the lake island. This is Baramos's Den.
Treasure Locations
Surroundings:
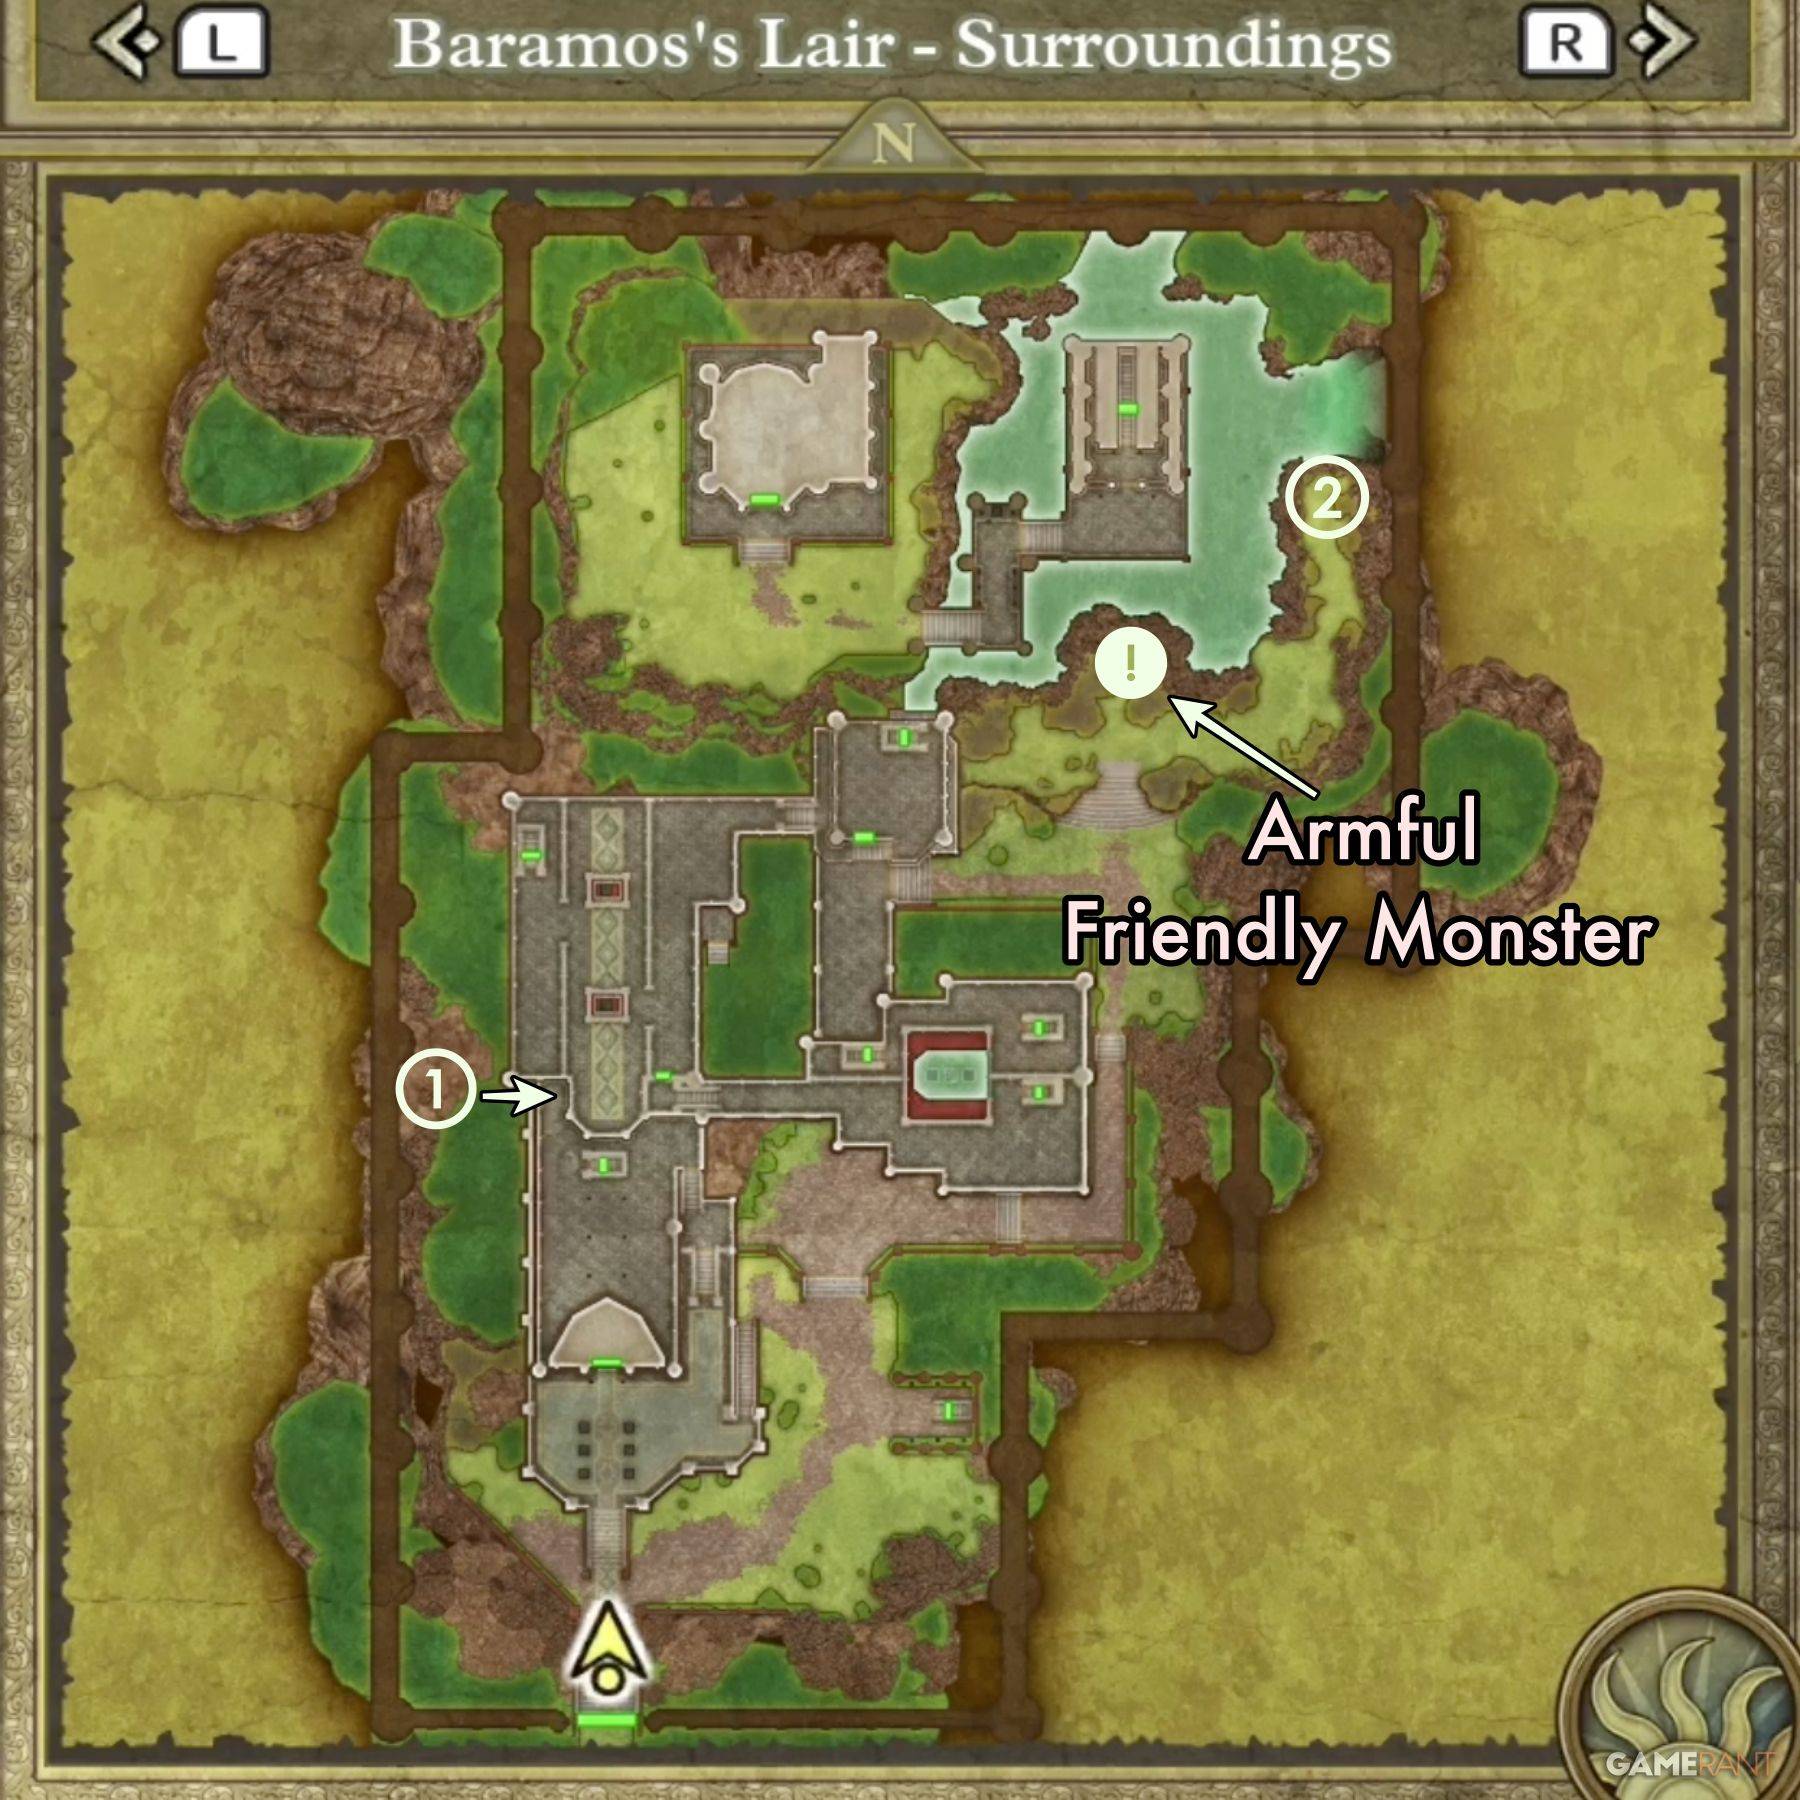
- Treasure 1 (Chest): Prayer Ring
- Treasure 2 (Buried): Flowing Dress
Central Tower:
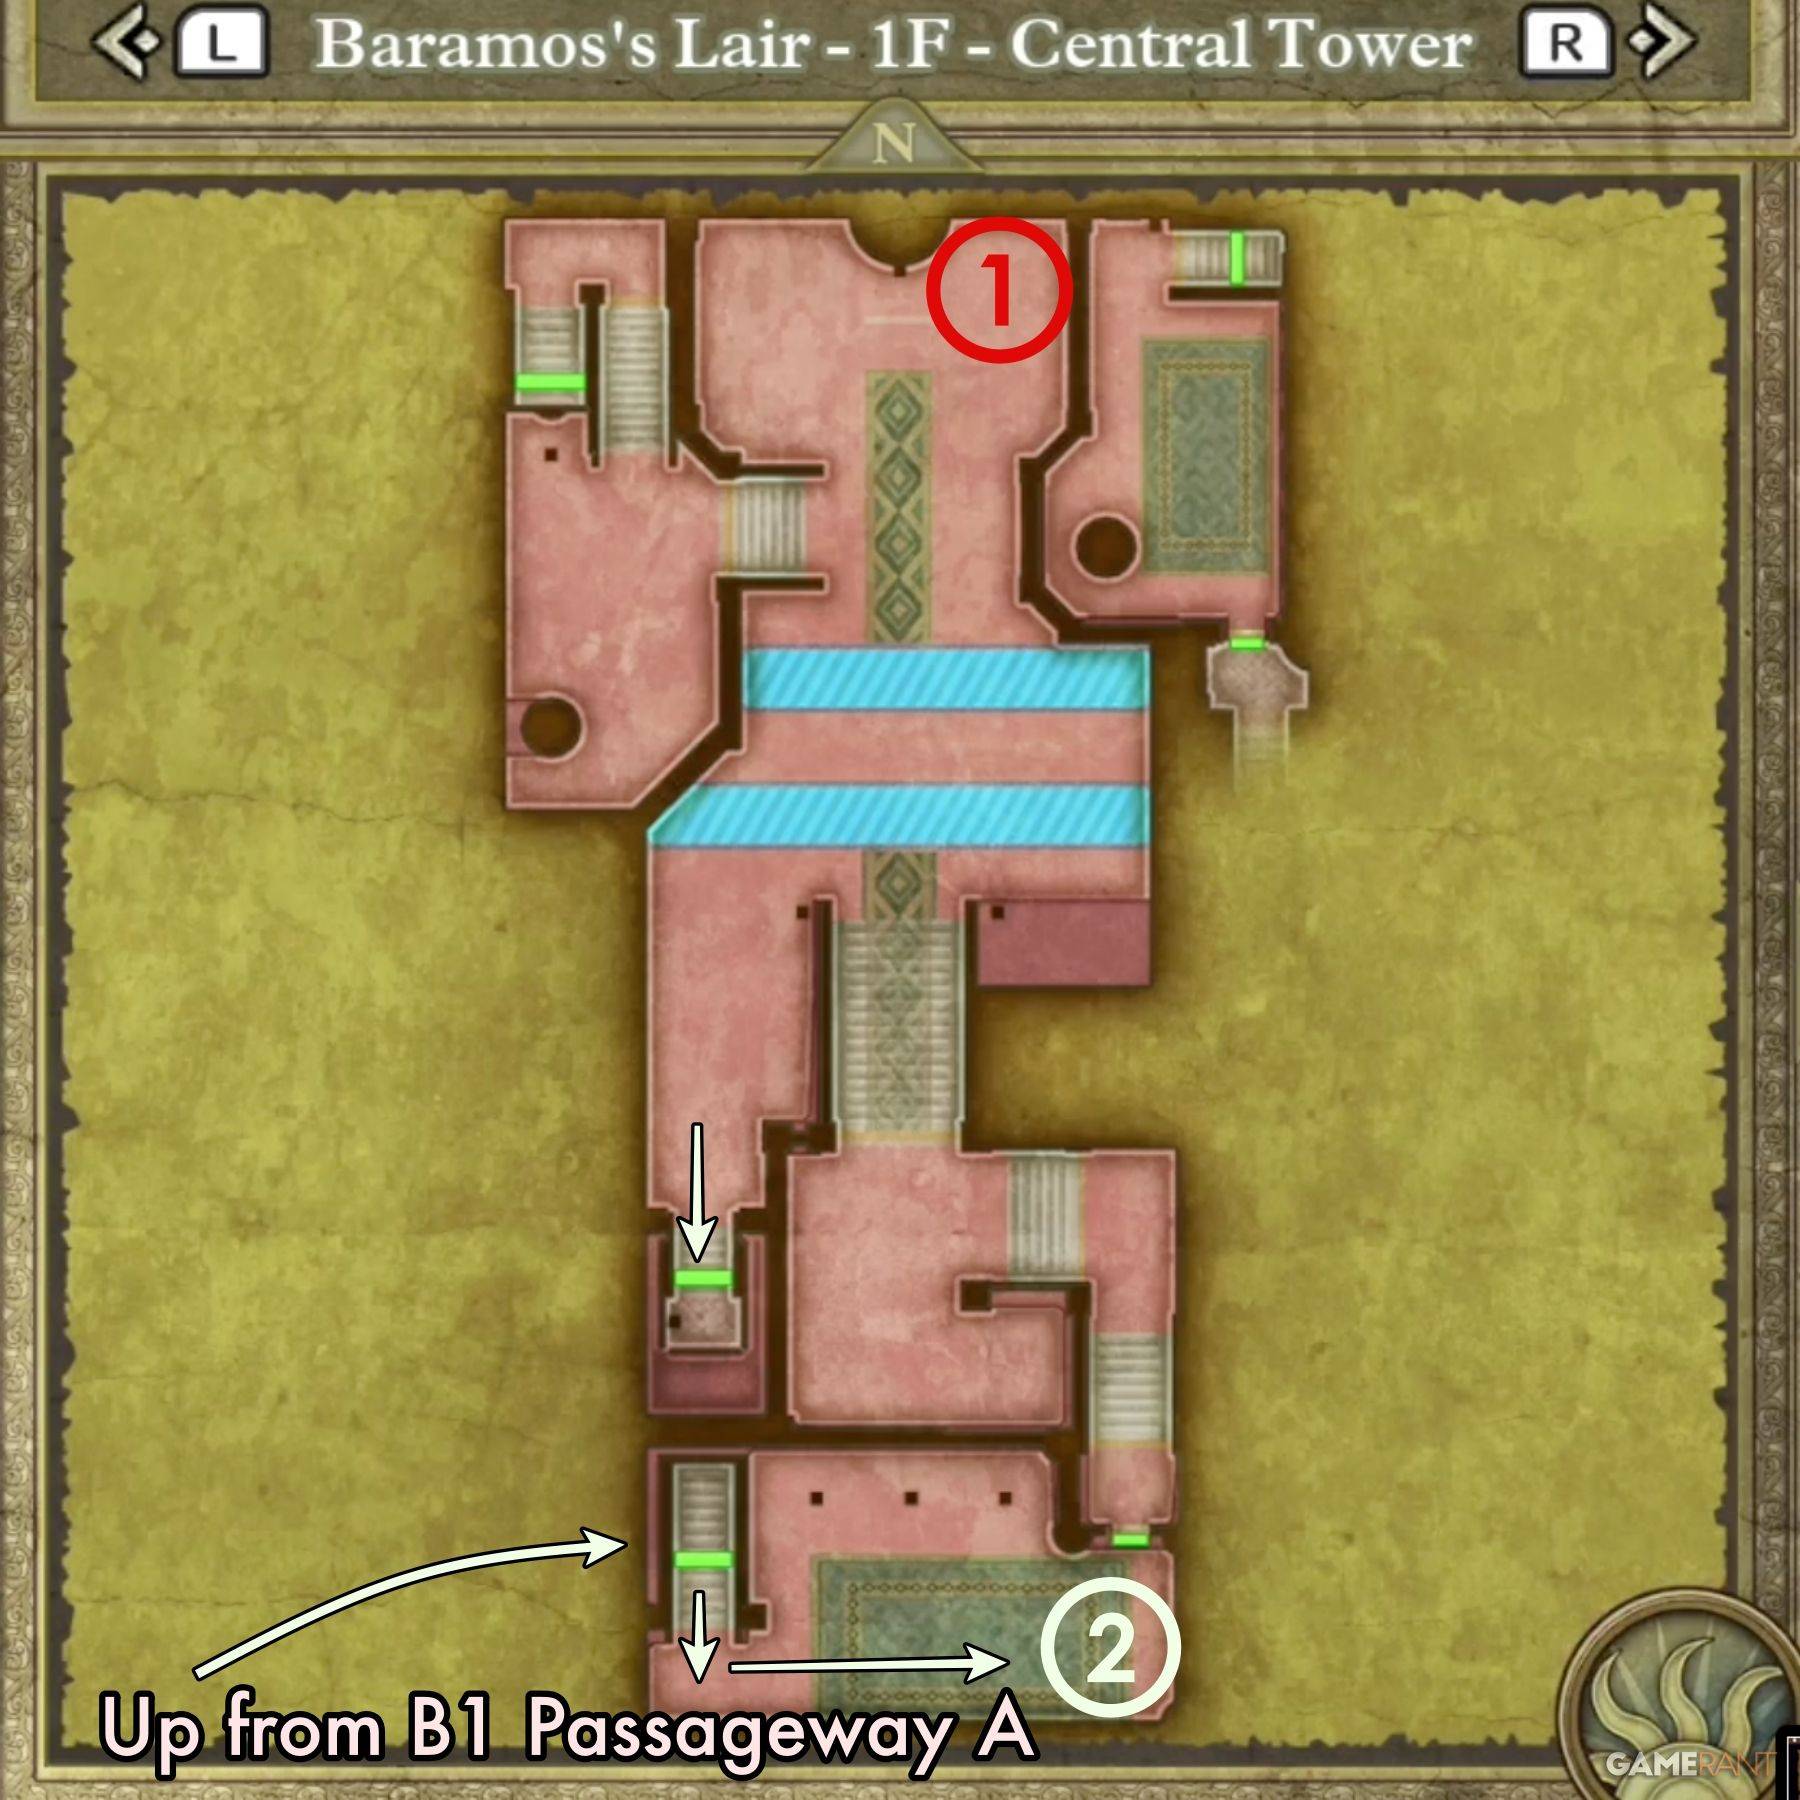
- Treasure 1: Mimic (enemy)
- Treasure 2: Dragon Mail
South-East Tower:
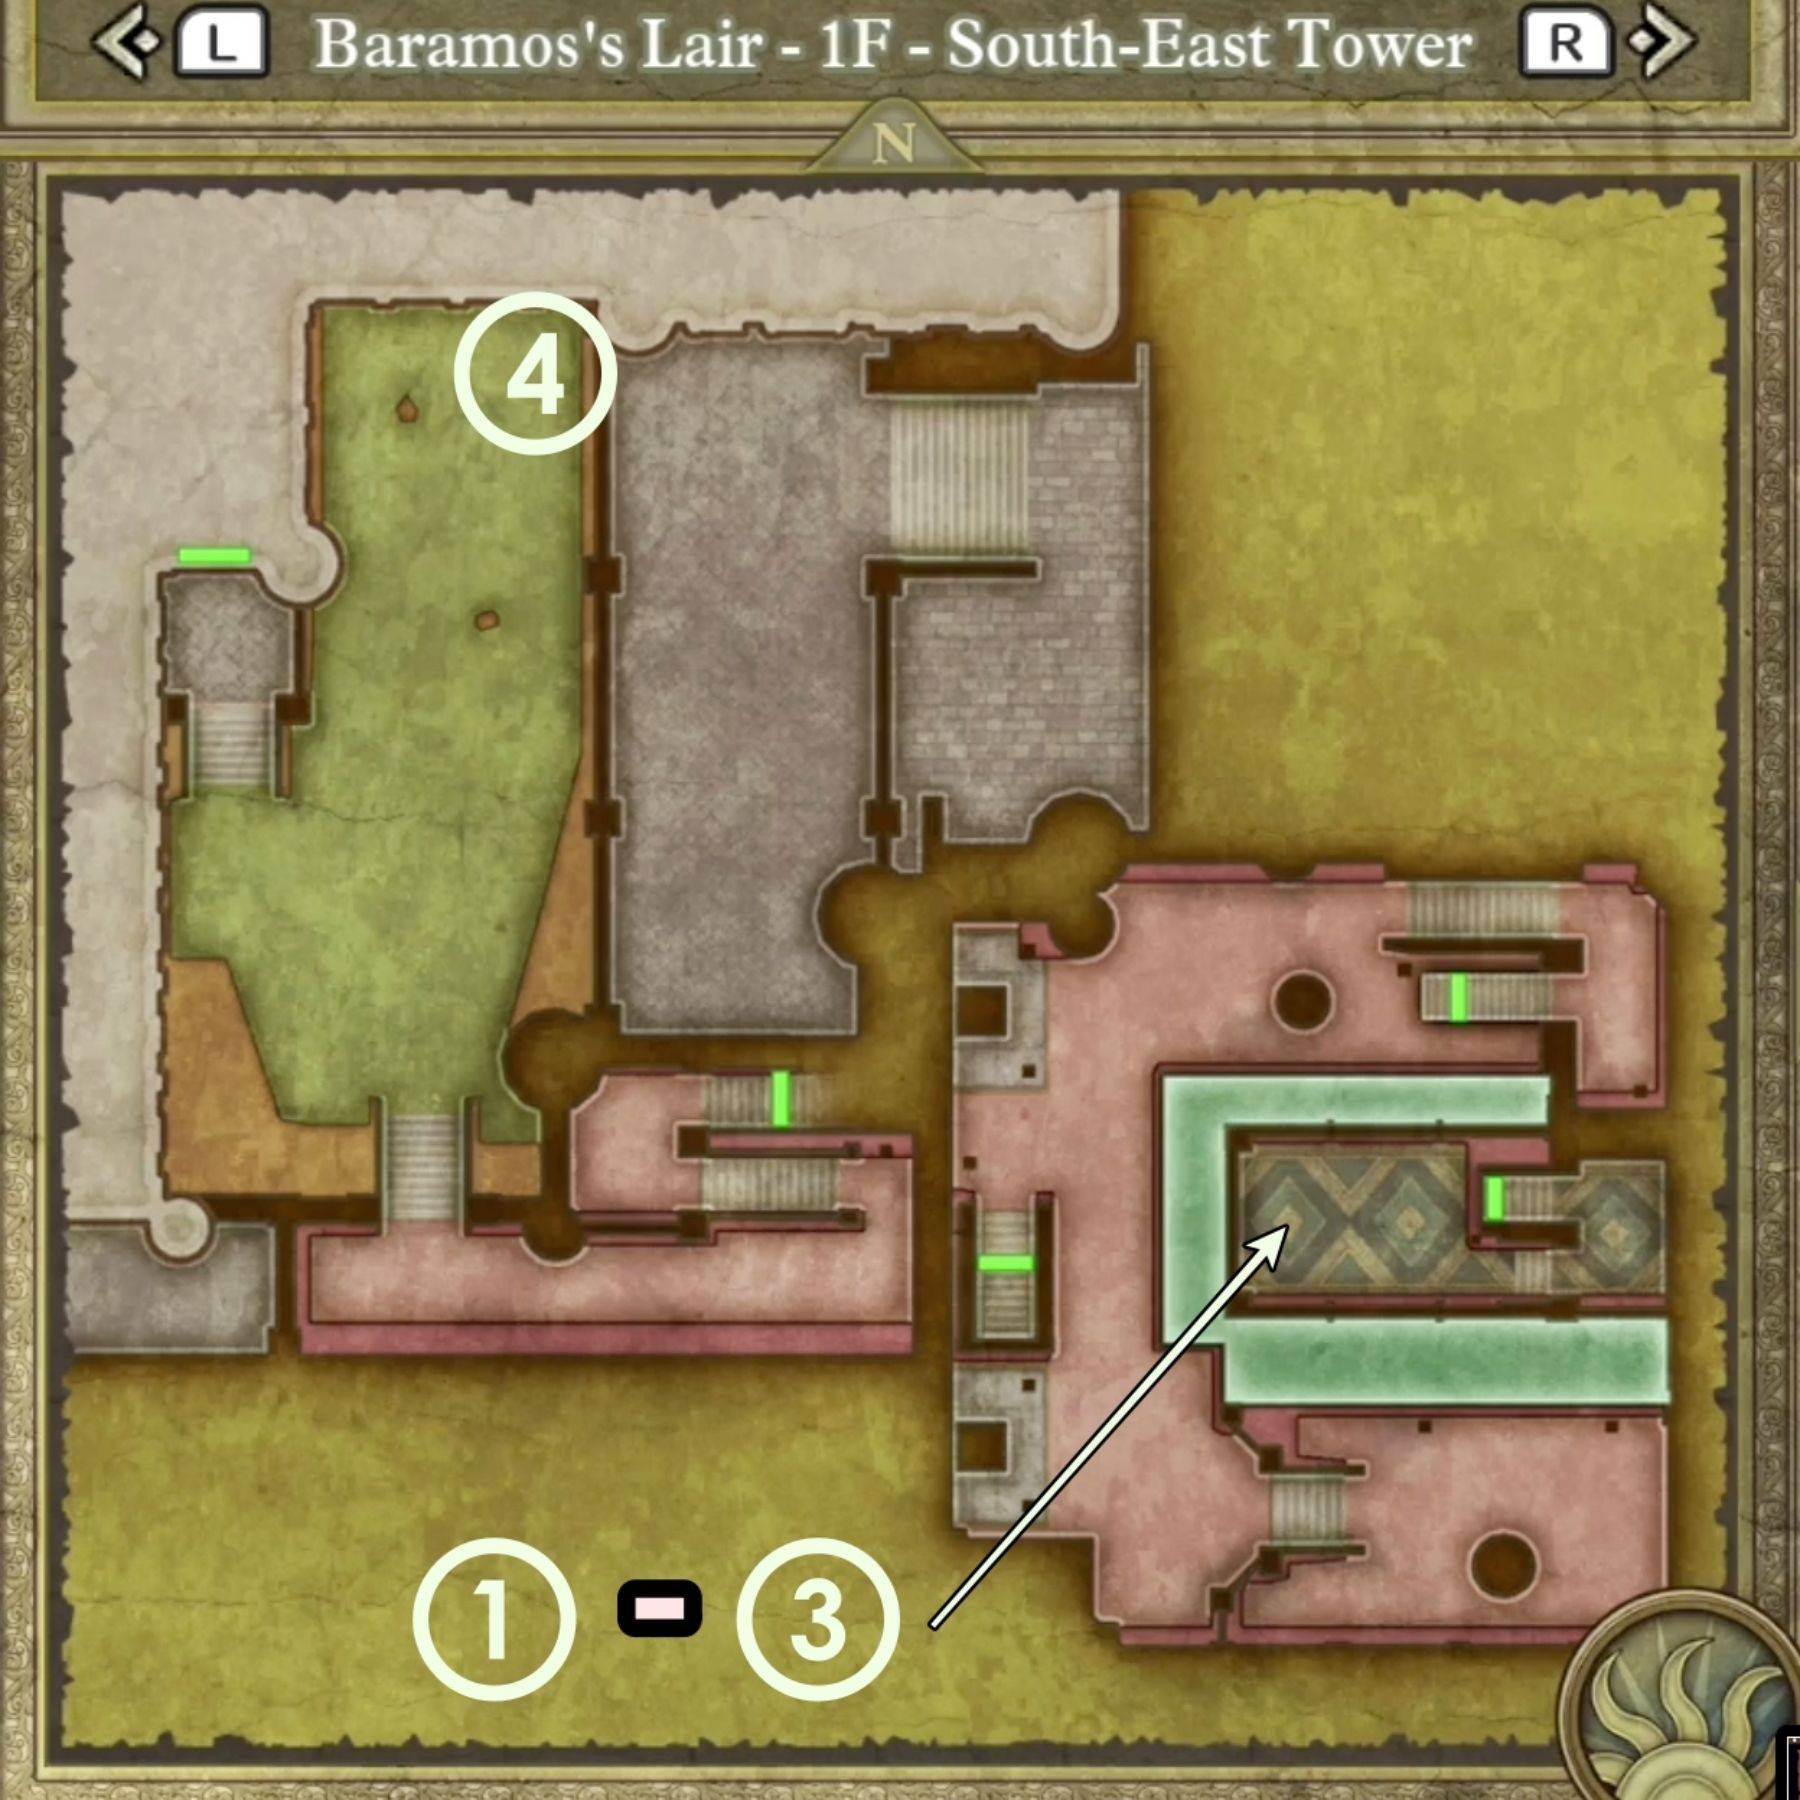
- Treasure 1 (Chest): Hapless Helm
- Treasure 2 (Chest): Sage's Elixir
- Treasure 3 (Chest): Headsman's Axe
- Treasure 4 (Chest): Zombiesbane
B1 Passageway:
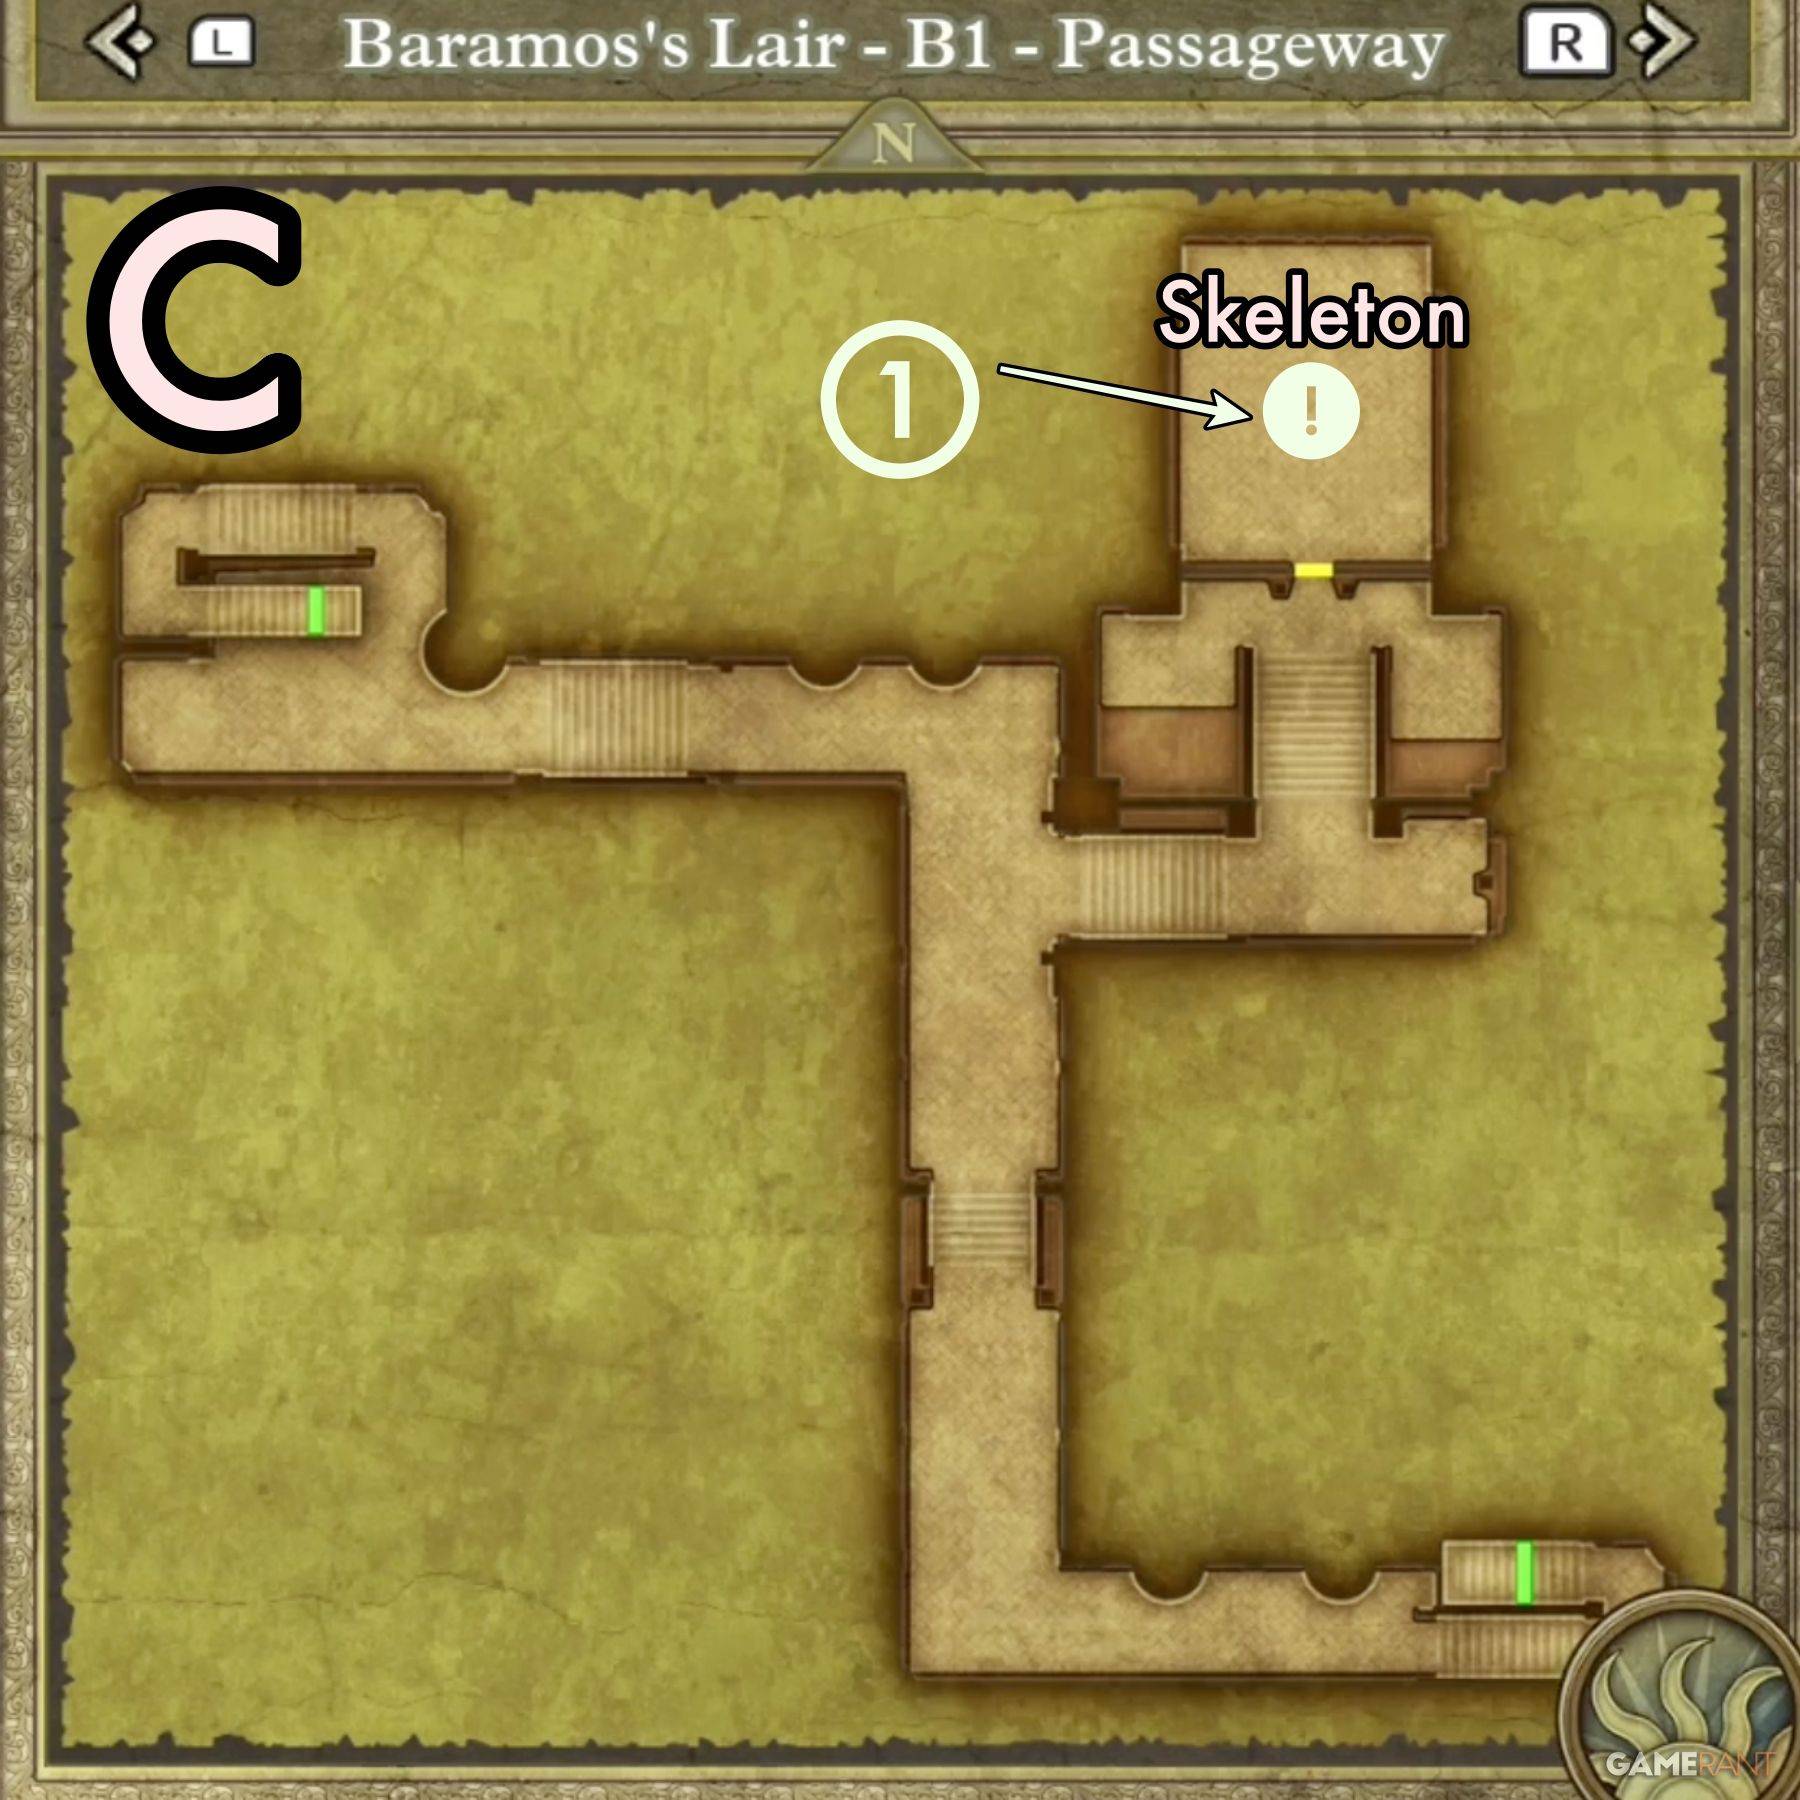
- Treasure 1 (Buried): Mini Medal
Throne Room:
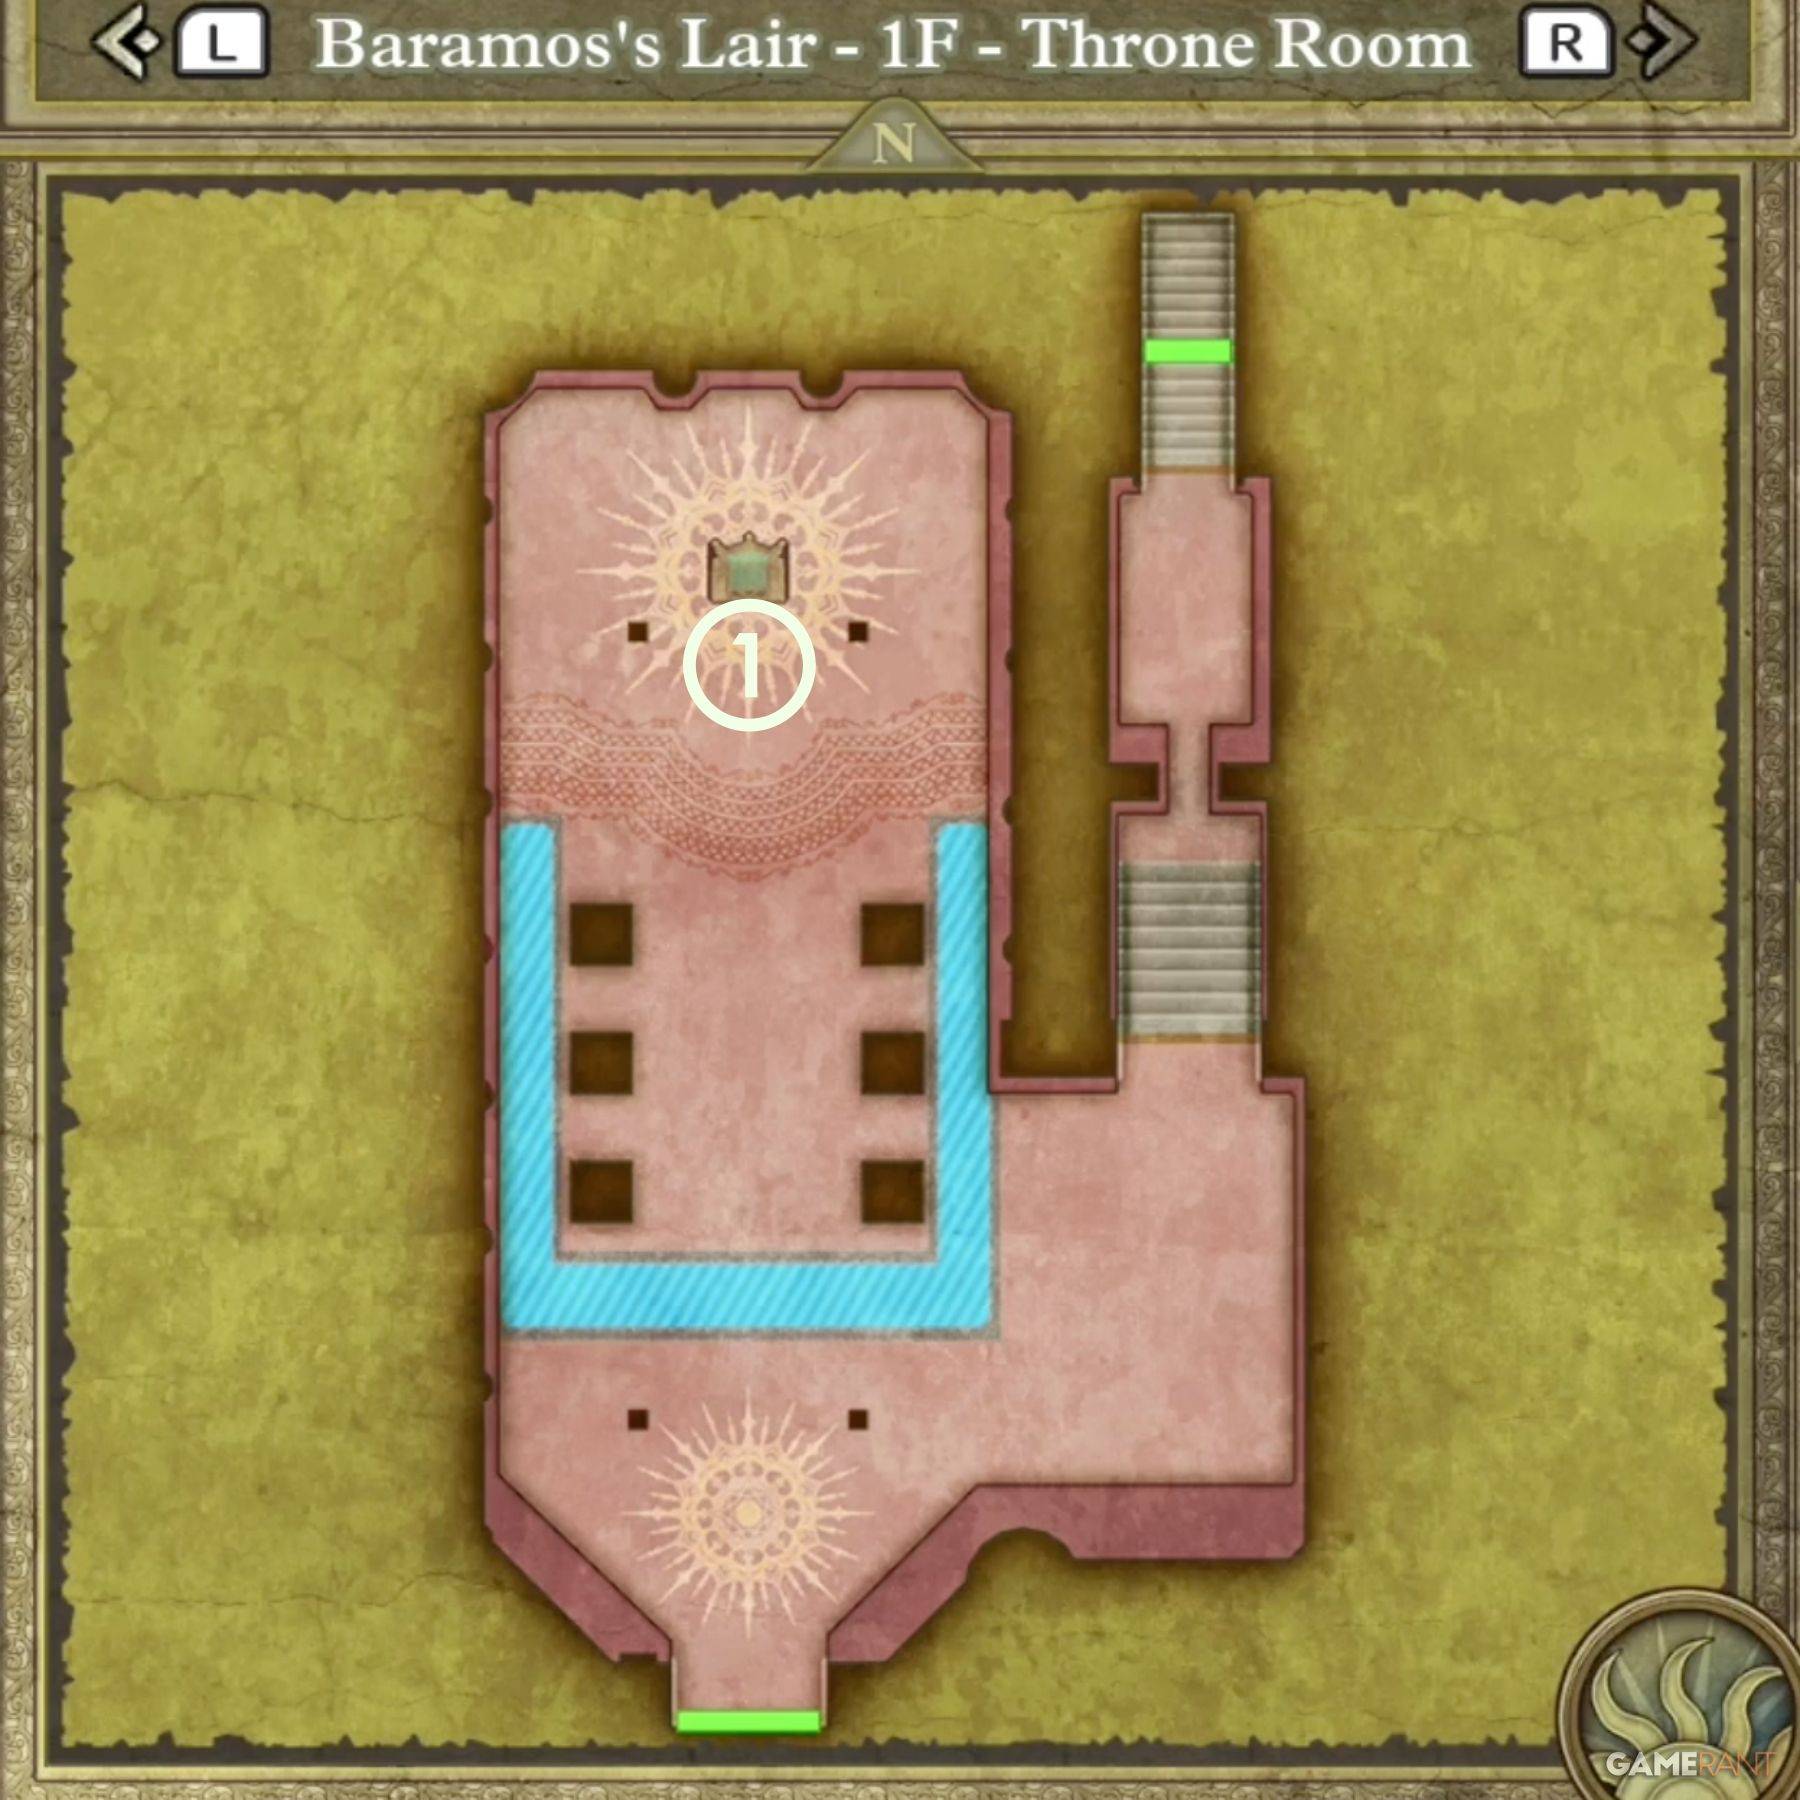
- Treasure 1 (Buried): Mini Medal
Defeating Baramos
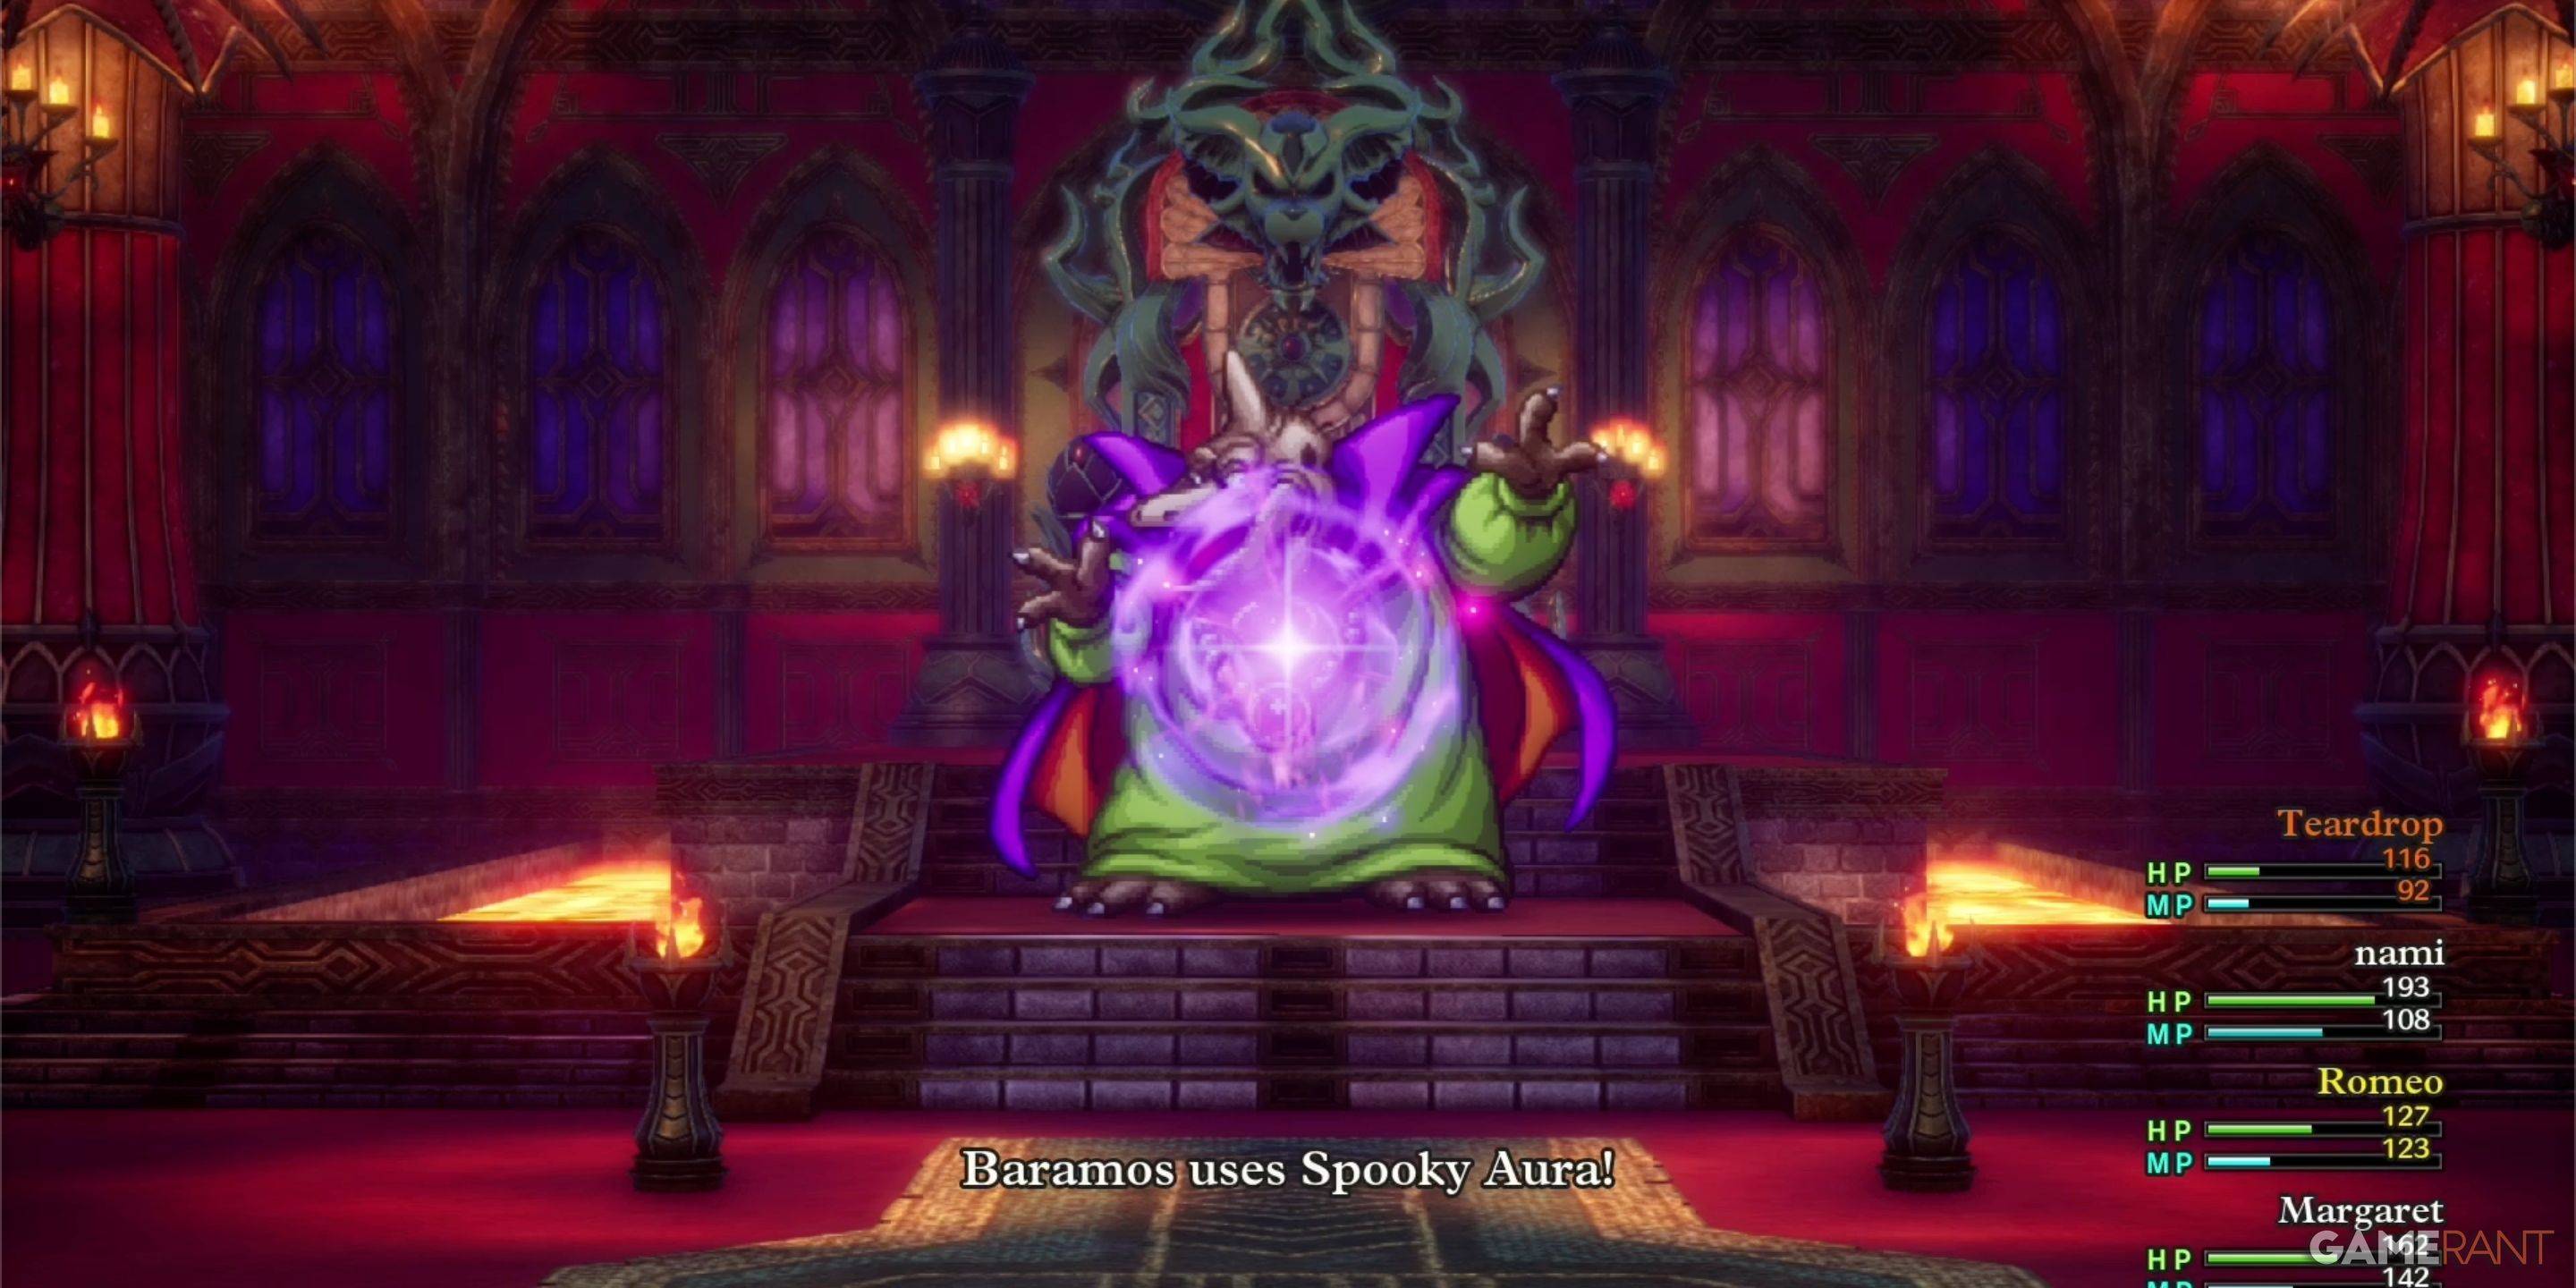
Baramos presents a significant challenge. Strategic preparation and adequate leveling are crucial.
Baramos's Weaknesses:
- Crack (Ice-based spells)
- Whoosh (Wind-based spells)
Utilize high-level spells like Kacrack and Swoosh. Prioritize healing; survival is key.
Monsters in Baramos's Lair

| Monster Name | Weakness |
|---|---|
| Armful | Zap |
| Boreal Serpent | TBD |
| Infanticore | TBD |
| Leger-De-Man | TBD |
| Living Statue | None |
| Liquid Metal Slime | None |
| Silhouette | Varies |
This comprehensive guide should equip you to successfully navigate and conquer Baramos's Lair in Dragon Quest 3 Remake. Remember to utilize your party's strengths and exploit Baramos's weaknesses for a triumphant victory!
 Latest Articles


 Latest Games